Monday, April 27, 2015

How to grow cucumbers from seeds

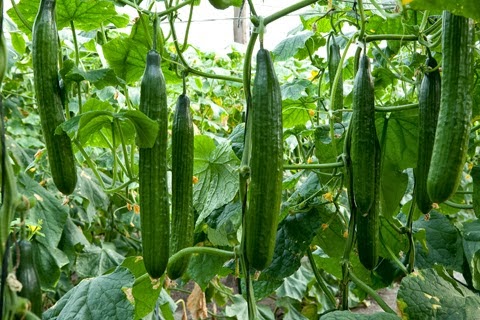
To begin an early crop, particularly in a northern European climate, it is best to start off your cucumber seeds either indoors or in a heated greenhouse. Of course, cucumber seeds can be sown directly in the garden once the danger of late frosts has passed, but this will result in a later crop.

You can begin sowing cucumber seeds any time from the end of March. Using either 2/3 inch pots or a modular plug tray, fill with a good quality seed compost. Using a dibber, or – as in my case - the rounded end of a pencil, make two holes near the center of the pot/module.

Place one cucumber seed into each hole, then back fill with compost and water in thoroughly. The tray/pots are now ready to be moved to a warm windowsill, heated propagator or heated greenhouse. Should you wish, you can cover the pots/trays with a sheet of glass, perspex or cling-film in order to maintain humidity.

Cucumber seed will germinate quite quickly - usually not much more that a week – and as soon as the new seedling begin to emerge any coverings should be removed. Once the seedlings have reached an inch or two, the weaker of the two seedlings can be removed.

Keep well watered – but not waterlogged – and feed with a half strength liquid fertilizer once a week. Once they have between 2 and four true leaves the seedlings can be planted outside into their final positions once the threat of late frosts are over, but they will need to be hardened off for a couple of weeks before hand. If a cool period of weather is due it is sometime worth waiting a few days. This can be done by bringing them back undercover overnight or protecting them with a cloche or small poly-tunnel.

Plant them approximately 18 inches apart in rows that are spaced every 5 feet.
Wednesday, April 1, 2015

10 most popular breeds of wool, meat and dairy sheep

Sheep are highly demanded in the areas where people have backyards or farms. It is indeed among the highly adored backyard fellows because of its advantages. It is a multi-purpose livestock that is raised for skin, meat, dairy and fiber. Truly, all the sheep can be used for dual-purpose; that is meat and fiber. However, particularly some breeds excel in one aspect. For example, there may be one kind of breed that tastes amazing; some type may be fantastic in providing with a good amount of milk. This also depends upon their growth cycle; therefore, you must choose the breed after clearly understanding the benefits of each type.

It is the sheep breed, which remains popular for its quality wool. It produces a premium quality fine sheep fleece, which is highly demanded all over the world. The hand-spun obtained from merino is used in making clothes for babies, shawls and other warm accessories. However, it cannot be used in daily wear. It is sensitive to handle, so only the experienced weavers tend to purchase this high quality wool. If you have it as your livestock, you can earn a lot.


With the origin from Britain, these medium to large sized, curly hair sheep is known for its quality carcass. Not only this, but it is also valued for its skin by the weavers. It is considered as “rare” in many parts of the world – but, farmers are trying to form newer breeds out of this breed because it is valuable for human use. Approximately, they are around 2000 in the world today.


This sheep remains popular worldwide and weights between 260 to 350 pounds. It is popular for its lovely and finest wool and fleece, which is demanded all over the world for weaving and designing.


It belongs to the category of sheep that produces delicious meat. It is popular among the domestic sheep farming and can be found easily in major states of the US. The sheep has an amazing milk producing and meat giving ability – it even has a faster breeding ability. This is among the most popular white face sheep in the world and has a huge presence all over the globe. Suffolk sheep, however, retains the strongest position in terms of presence over the world.


Belonging to arid climatic condition, this breed has the ability to adjust to varying seasonal changes. It is highly popular in western regions. The body has a good combination of hair and wool and they vary from medium to large size. It produces delicious mutton, which sells like hot cakes in the market. The wool is even used by the weavers for producing clothes and other stuff.


Known for its excellent and delicious mutton, the sheep has medium wool,dark faced and hornless breed. They are medium sized, quickly growing breed. This breed is a result of cross culture, and that is the reason for its varying skin tone.

Those who are interested in having the best type of meat-type sheep breed must go for Suffolk sheep. They contain medium wool with black legs and face. This is among the largest rowing breed, which offers tasty mutton.


This kind of sheep is used for hunting, hair and beautiful horns. The meat is lean and lacks muttonly flavored as other wool breeds have that is good for people who dislike strong mutton smell. Some of the hair sheep breeds are obtained by mating the cross-cultural breeds like Jacob sheep, Merino and Rambouillet. Other popular hair breed includes: Painted Desert sheep, Black Hawaiians, Texas Dallas.


With impressive horns, dotted monochrome body and face, this sheep remains popular for its beauty, skin and appeal. They lack the outer coat and have a thinner, fine fleece. They are highly used for hides and wool.


This is the most common and productive breed of sheep which is known for its quality milk in the world. On average, it produces around 990 to 1,100 pounds per 220 to 240-day.


Wednesday, March 11, 2015

Growing Grapes for Beginners


Many people choose to carry out hobbies and small businesses of growing fruits and vegetables, and a lot of satisfaction can be gained from eating or selling items that you grow yourself. Watching the growth of a plant into a nutritional fruit or vegetable is a very rewarding experience, and I am certain that you will find great pleasure in growing grapes. But, before going out and beginning planting your own vineyard, there are some things that you must understand about raising grape vines:-

Growing grapes is not a very difficult task. However, it does take patience. Once you have given your grape vines some attention and time, you can and will be enjoying them for years to come.

Before beginning the preparation for your grape vines, you must first determine what type of grapes you want to plant. This will be determined by your climate and the area in which you live. The reason why you want to plant grapes will also have a major impact on the selection of grapes you choose. Some grapes are better suited for picking and eating while others work better in jams, jellies, and juices(recipes to follow in another hub). Knowing your purpose for the grapes and the climate in which you wish to grow them should be discussed with your local specialist nursery before making your choice.

Once you have decided on the type of grape you want to plant, one of the first steps in growing grapes and getting your grape venture underway is selecting the location for the vines. It is very important to ensure that you have adequate soil. You will need to fertilize the soil with either store purchased or natural fertilizers to give your vines a good healthy beginning. Many vine growers believe that organic or natural fertilizers work best for grape vines.

You will also want to ensure that the area that you choose has good drainage. Many grape growers find that planting grape vines on a slope works very well. Good drainage is a key factor in keeping grape vines disease free. Grape vines often thrive in rocky areas where other plants do not keep these factors in mind when choosing your location for planting.

Autumn is often the best time of year to plant grape vines. It is better if the plants are in a dormant state, and timing will be an important contributes to the success of your grape vines.

At the beginning of the growth of your grape vines, you will need to make sure that the plants receive about one inch of rain per week. If your area does not receive this much rain, you will need to water your plants.

Once your vines have grown leaves, make sure that they remain dark green and healthy. If the leaves do not appear to be healthy, you will need to add nutrients to the soil, which we will discuss in a later hub.

As the vines begin to grow, you will need to train them to grow on trellis. This trellis can be made from wood, iron, PVC, or wire. Young plants often need a lot of coaching to begin growing in the right direction.

Once your vines have a good foundation for growth, you will see them begin to change and develop each day. Keep an eye out for weather and pests damage and before long, you will be overwhelmed with the excitement of your first grape clusters!

So, let’s get started growing grapes!

Wednesday, February 18, 2015

5 Tips for Starting Seeds Indoors

Starting seeds indoors can be frustrating, exhilarating or sometimes a little of both. As someone who has serially killed hundreds, maybe thousands of innocent seedlings, by using these techniques, I've increased my success rate in starting seeds successfully.


Let There Be Light: For seedlings to grow properly, they need light. And lots of it. Chances are that you don't have enough natural light to grow healthy robust seedlings, even if you have a south facing window. If seedlings don't get enough light they will be spindly and won't make it to healthy adulthood. Don't be alarmed though, setting up an artificial light system can be easy and not expensive.
I have a simple set up in my basement using inexpensive metal shelves. I have attached shop lights using "S" hooks and the chains they came with, so they can be raised as the plants grow. Sometimes if you're growing several types of plants under one light, one side of your shop light will have to be higher than the other, as plants grow at very different rates. I have fitted the shop lights with one cool and one warm fluorescent bulb. I also plug these lights into inexpensive timers, so I don't have to keep track of turning them on and off. Once the seeds have germinated I set the lights to go on for 14 hours during the day. I also keep them as close as possible to the seedlings - two to three inches at most. It's amazing how much better and faster seedlings grow if the lights are that close.

Use Self-Watering Seed Starting Systems: I will never start a seed in a small peat pot again. They just dry out too fast. Self-watering seed starting systems are becoming increasingly popular, and there are many to choose from. I've tried several and my hands down favorite is the APS Seed Starting System from Gardeners Supply. I'm also very partial to my own design of a free, self-watering seed starter that you can make from a supermarket pie plate and some string.

Use a Good Seed Starting Medium: One might think that given all the seeds that grown in the ground and do just fine, that you could grow your indoor seeds in garden soil. Bad idea. Seedlings are very susceptible to a dreaded fungus called “damping off.” You know you have it when all your seedlings are fine one minute and the next day, they have keeled over, dead as a doornail. With all the work starting seeds requires, it makes sense to give seedlings the best chance for survival by using a sterile planting mix.

Feed Your Seedlings: Most sterile planting mixes don't have don’t have any built-in nutrients at all. For awhile seedlings get all nutrition they need from the seed itself, but when you start seeing leaves you’ll want to feed your seedlings with a diluted solution of liquid fertilizer.

Ventilation and Wind: Seeds are really meant to be planted outside in the elements. They are designed to get sun, rain and wind. By planting indoors you are really attempting to fool Mother Nature. Lots of us are planting our seeds in our basements, the part of the house that is probably least like the natural world, with air that doesn’t move.

Not surprisingly, it turns out that moving air is an important factor in helping seedlings to develop a robust root system and strong stems. To approximate wind, try setting a fan on low near your seedlings. If you do, you will get sturdier plants. I also gently run my hands along the tops of my seedlings for a couple of minutes a day to give them even more of a workout.

Read the Seed Packet: Most seed packets have a wealth of information. First, they will tell you how deep to plant your seeds - a critical piece of information. Most packets will tell you if it's even ok to plant the seeds you are considering indoors - some plant just flat out don't like to be transplanted and are better off started in the container garden in which they will live. The packet will tell you how long it should take for the seed to germinate and how many weeks before the last frost you should start your seeds. Keep the seed packet for the life of the plants. Chances are there will be information that you will need at some point (particularly if you've thrown the packet away).

Tuesday, January 27, 2015

How to Know if A Goat is Sick

If you're new to raising goats, you might wonder how you will know if one of your goats is sick. While some signs of illness are self-explanatory, here's a handy checklist for "what a healthy goat looks like" so that when things are off, you can be on top of the situation. Also check out our list of goat diseases so that you can match your goat's symptoms to a possible cause - and treatment.


Signs of Stress in New Goats

When you first buy your goats and bring them home, they may be stressed from the transport. And stress is also a sign that something may be off in your goat care: perhaps not enough, or the wrong kind, of food, or insufficient water intake, or maybe one goat is being bullied by its more aggressive herdmates.

Whatever the root cause of the stress, the signs of illness below can also be the symptoms and signs of stress in goats.

At their worst in a newly transported goat, these can develop into shipping fever - characterized by pneumonia, diarrhea, a fever over 103.5 degrees F, nasal discharge, coughing, or rapid breathing. If you suspect shipping fever, contact a vet immediately.

Signs of Illness in Goats

Weakness. Your goat might not walk normally, or won't be her usual playful self. Her head and ears may droop. Not getting up at all would be the most extreme sign of weakness.
Not eating or drinking as usual. If your goat isn't drinking or eating normally, something may be wrong.
Pressing head against wall or fence.
Not urinating, or difficulty urinating.
Feces aren't normal. Goats usually have pelleted feces. If your goat's feces is runny or loose, this indicates diarrhea.
Pale or gray eyelids and/or gums. Healthy goats have nice pink eyelids and gums.
Hot udder. This can indicate an abscess or infection of the udder.
Limping or staggering.
Runny nose and/or eyes.
Coughing, funny breathing, or unusual crying.
Isolation. If your goat isolates himself from the rest of the herd, something may be wrong.
Ears held strangely.

Wednesday, January 7, 2015

Tips and Tricks for Selling Produce at the Farmers Market

Overloaded with vegetables, herbs and chickens, or just thinking about next year? Whatever your motivation, bringing produce and food to sell at the farmer's market is a cornerstone of many small farms' marketing plans. Before you pack up the van or truck, learn how to maximize profits and minimize undue effort when you sell at the farmers market.

Choose Your Products Wisely
Let's face it. Everyone has piles of zucchini, heads of romaine, and cucumbers. What are you going to offer that's different or unique? Is it a specialty lettuce, an heirloom tomato, or an uncommon herb? Check out this list of alternative crops as a jumping-off point for a brainstorm session.
Think outside the supermarket. What can you offer customers that the supermarket or even the local food co-op cannot? Some of the more unique things I've seen recently: sprouts and shoots, microgreens, rare lettuces, rare or uncommon herbs like marjoram, and value-added products like elderberry syrup, dried herbs, and bags of mixed roots with instructions/ideas for cooking them.

Information Overload
Potential customers go gaga over information. Clearly labeled prices are a good starting point. But go above and beyond. Make signs that answer your customers' common questions. Put information about your growing practices on cards for people to look at. Do your laying hens have names? Make a sign proclaiming, "Henrietta lays the yummiest eggs!" Get creative, think eye-catching.

Some things to think about when making your signs:
Is it organic, free-range, pastured, integrated pest management? Name the quality, then describe what it means to the customer.
Is it specialty, heirloom, or rare? Maybe a sign explaining that Roy's Calais Flint Corn is a rare, heirloom variety common in New England in the 19th century will spark someone's interest.
How do you use it? What is it good with? You might share that your kale is particularly tender, and that the baby leaves can be eaten raw in salad, for example. Selling a unique or uncommon herb? Suggest pairings with other herbs and with foods.

Bring photos of your farm, and print off your "About Us" page from your website and have it available for customers to read. While you're at it, it's a good idea to have business cards with your farm's name, location, hours, and website available. Brochures on CSA shares, copies of any newspaper or magazine articles featuring your farm -- think of anything and everything that showcases who you are and what you do and bring it for customers to look at.